DIY | The Art of Wall hanging
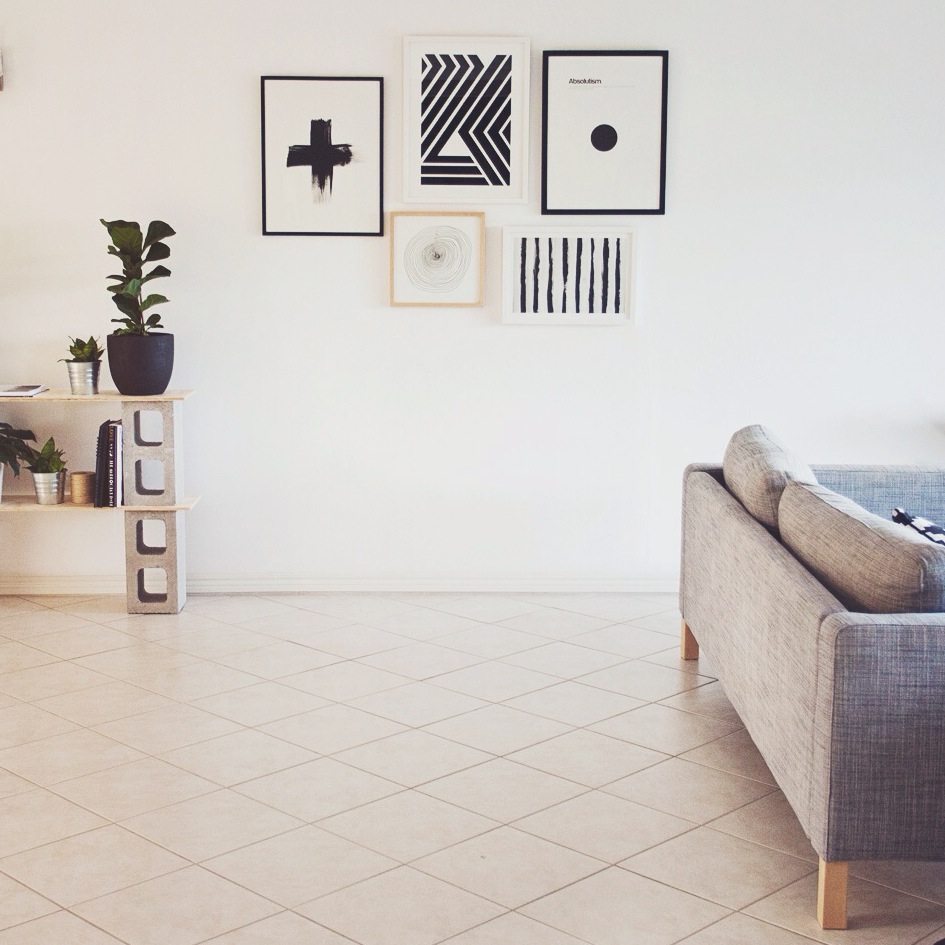
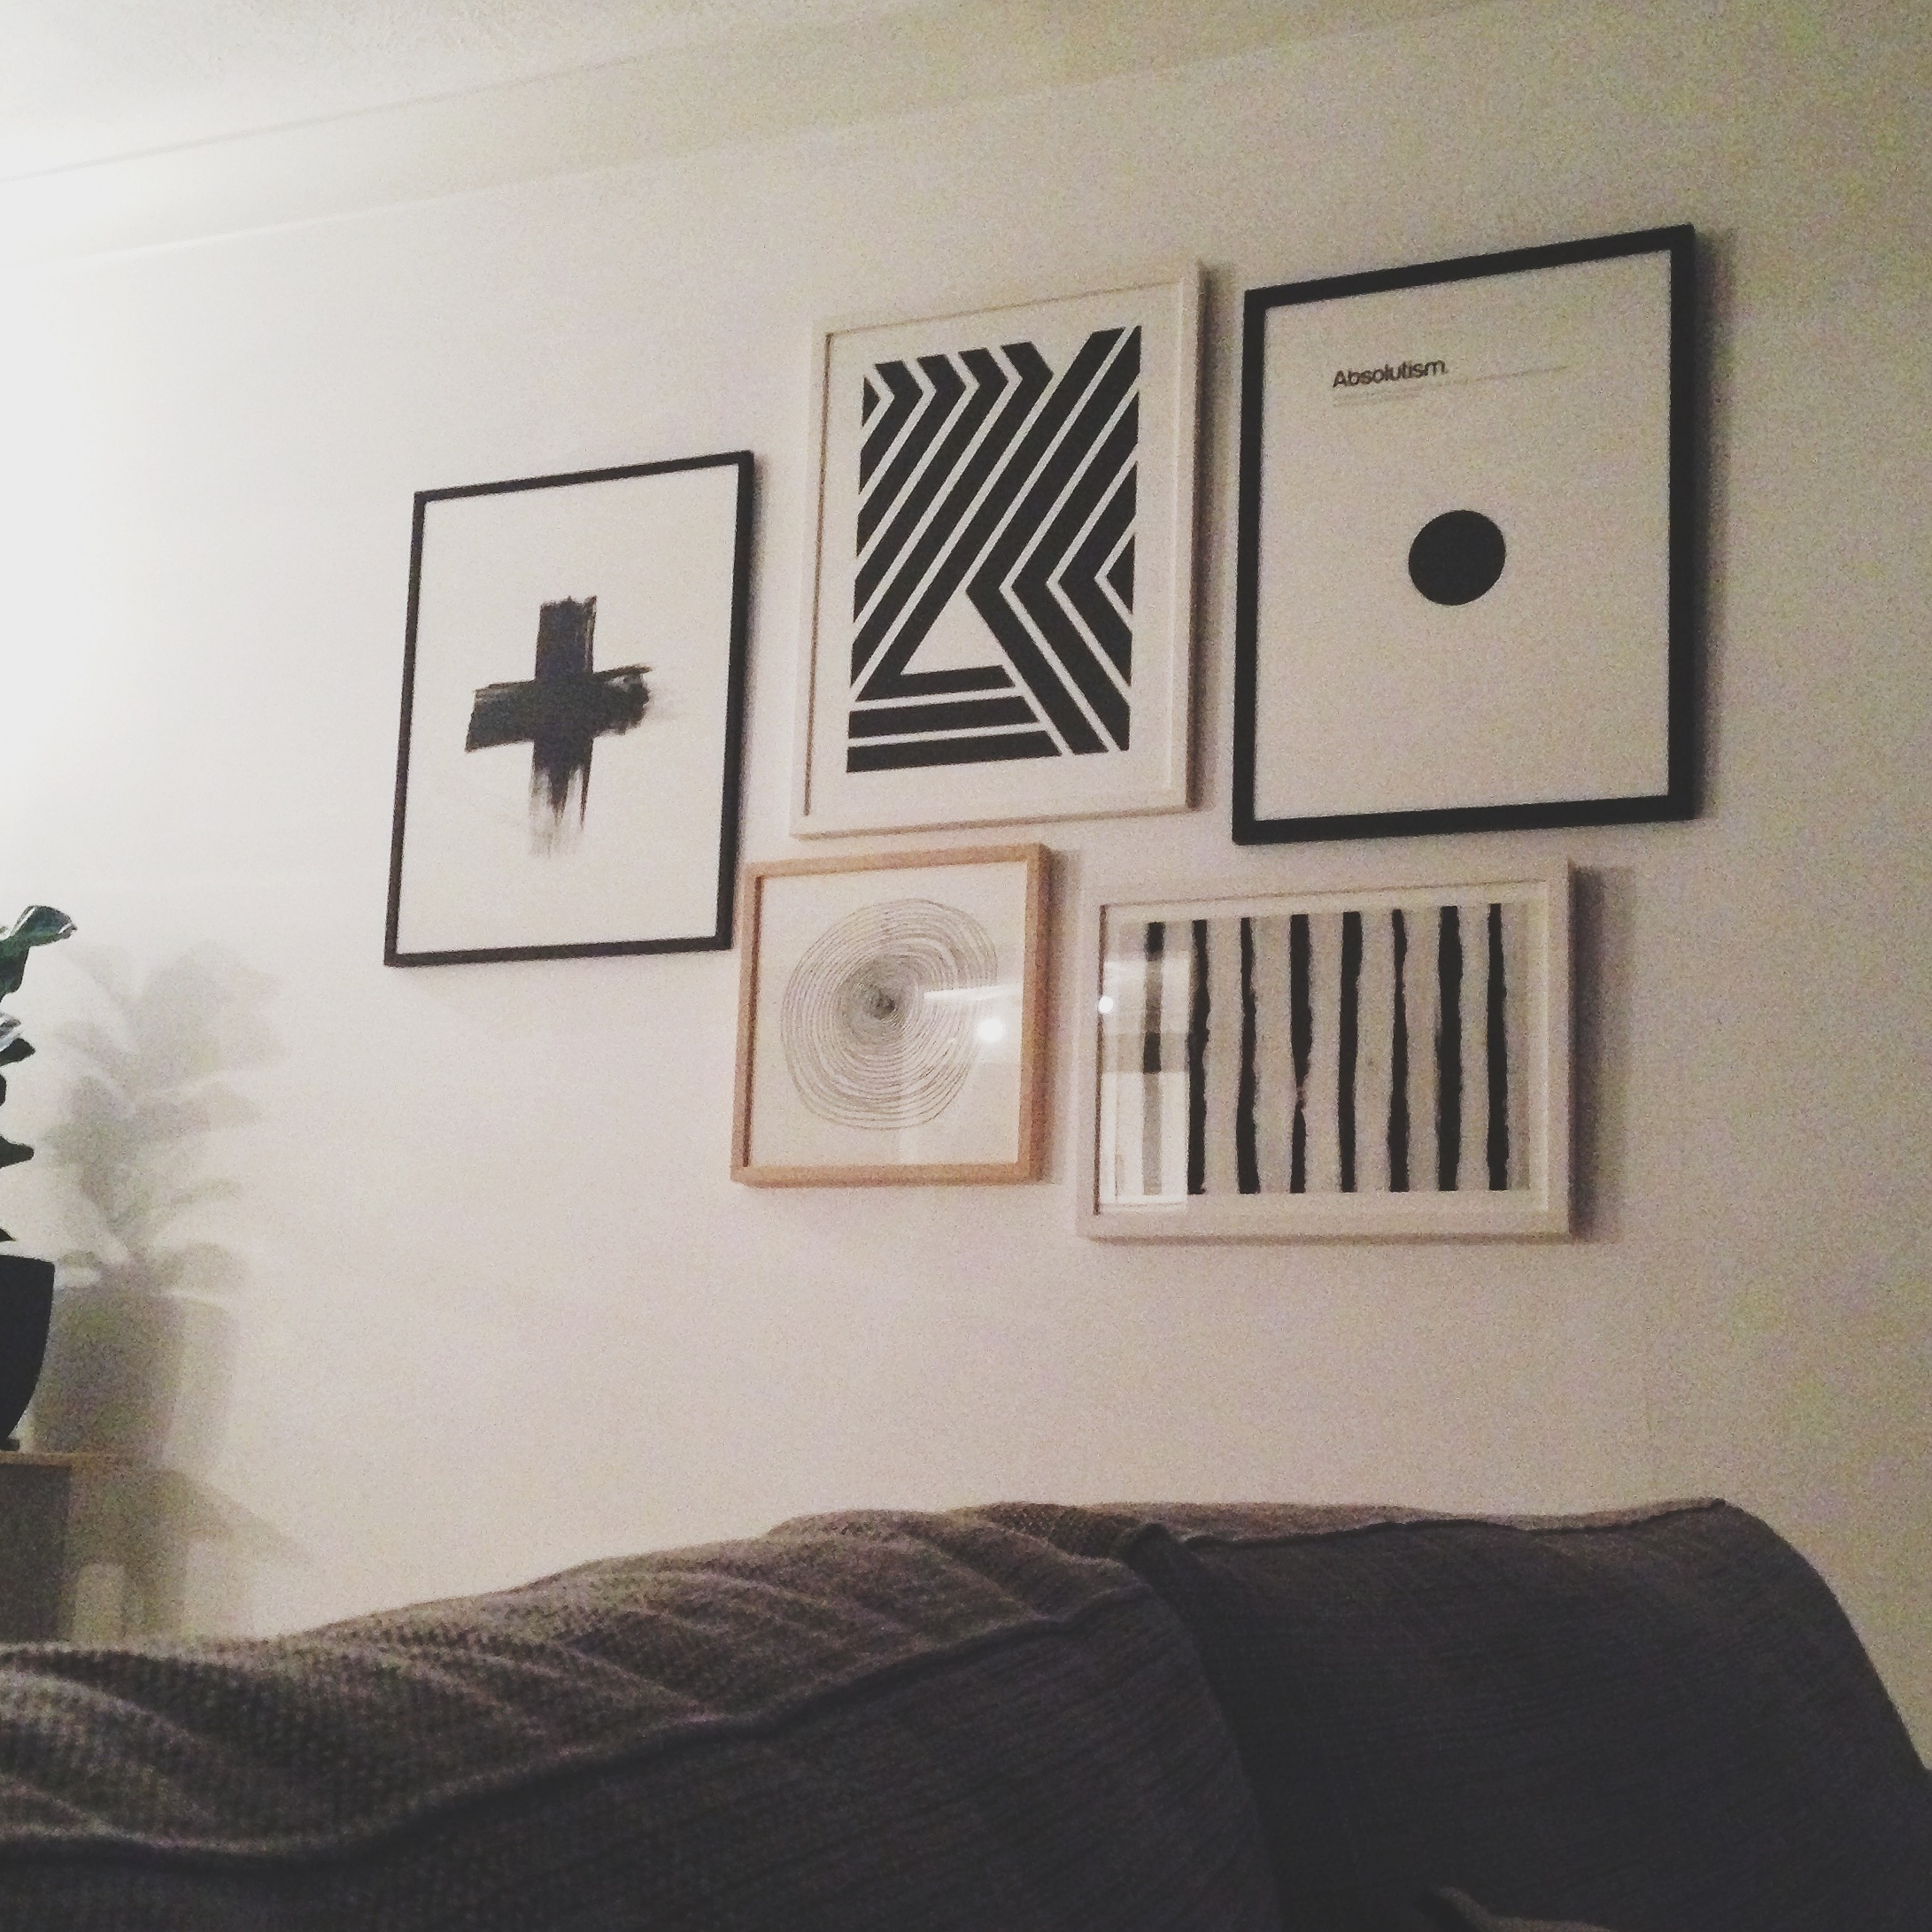
Hanging that favourite print on the wall sounds like an easy task, all those Pinterest pics of "so hot right now" apartment walls seems so simple! Here we are with our little A4 print hanging all alone near a plant too far away, left felling a little underwhelmed with the end result. Don't worry baby, we got you covered!
STEP ONE
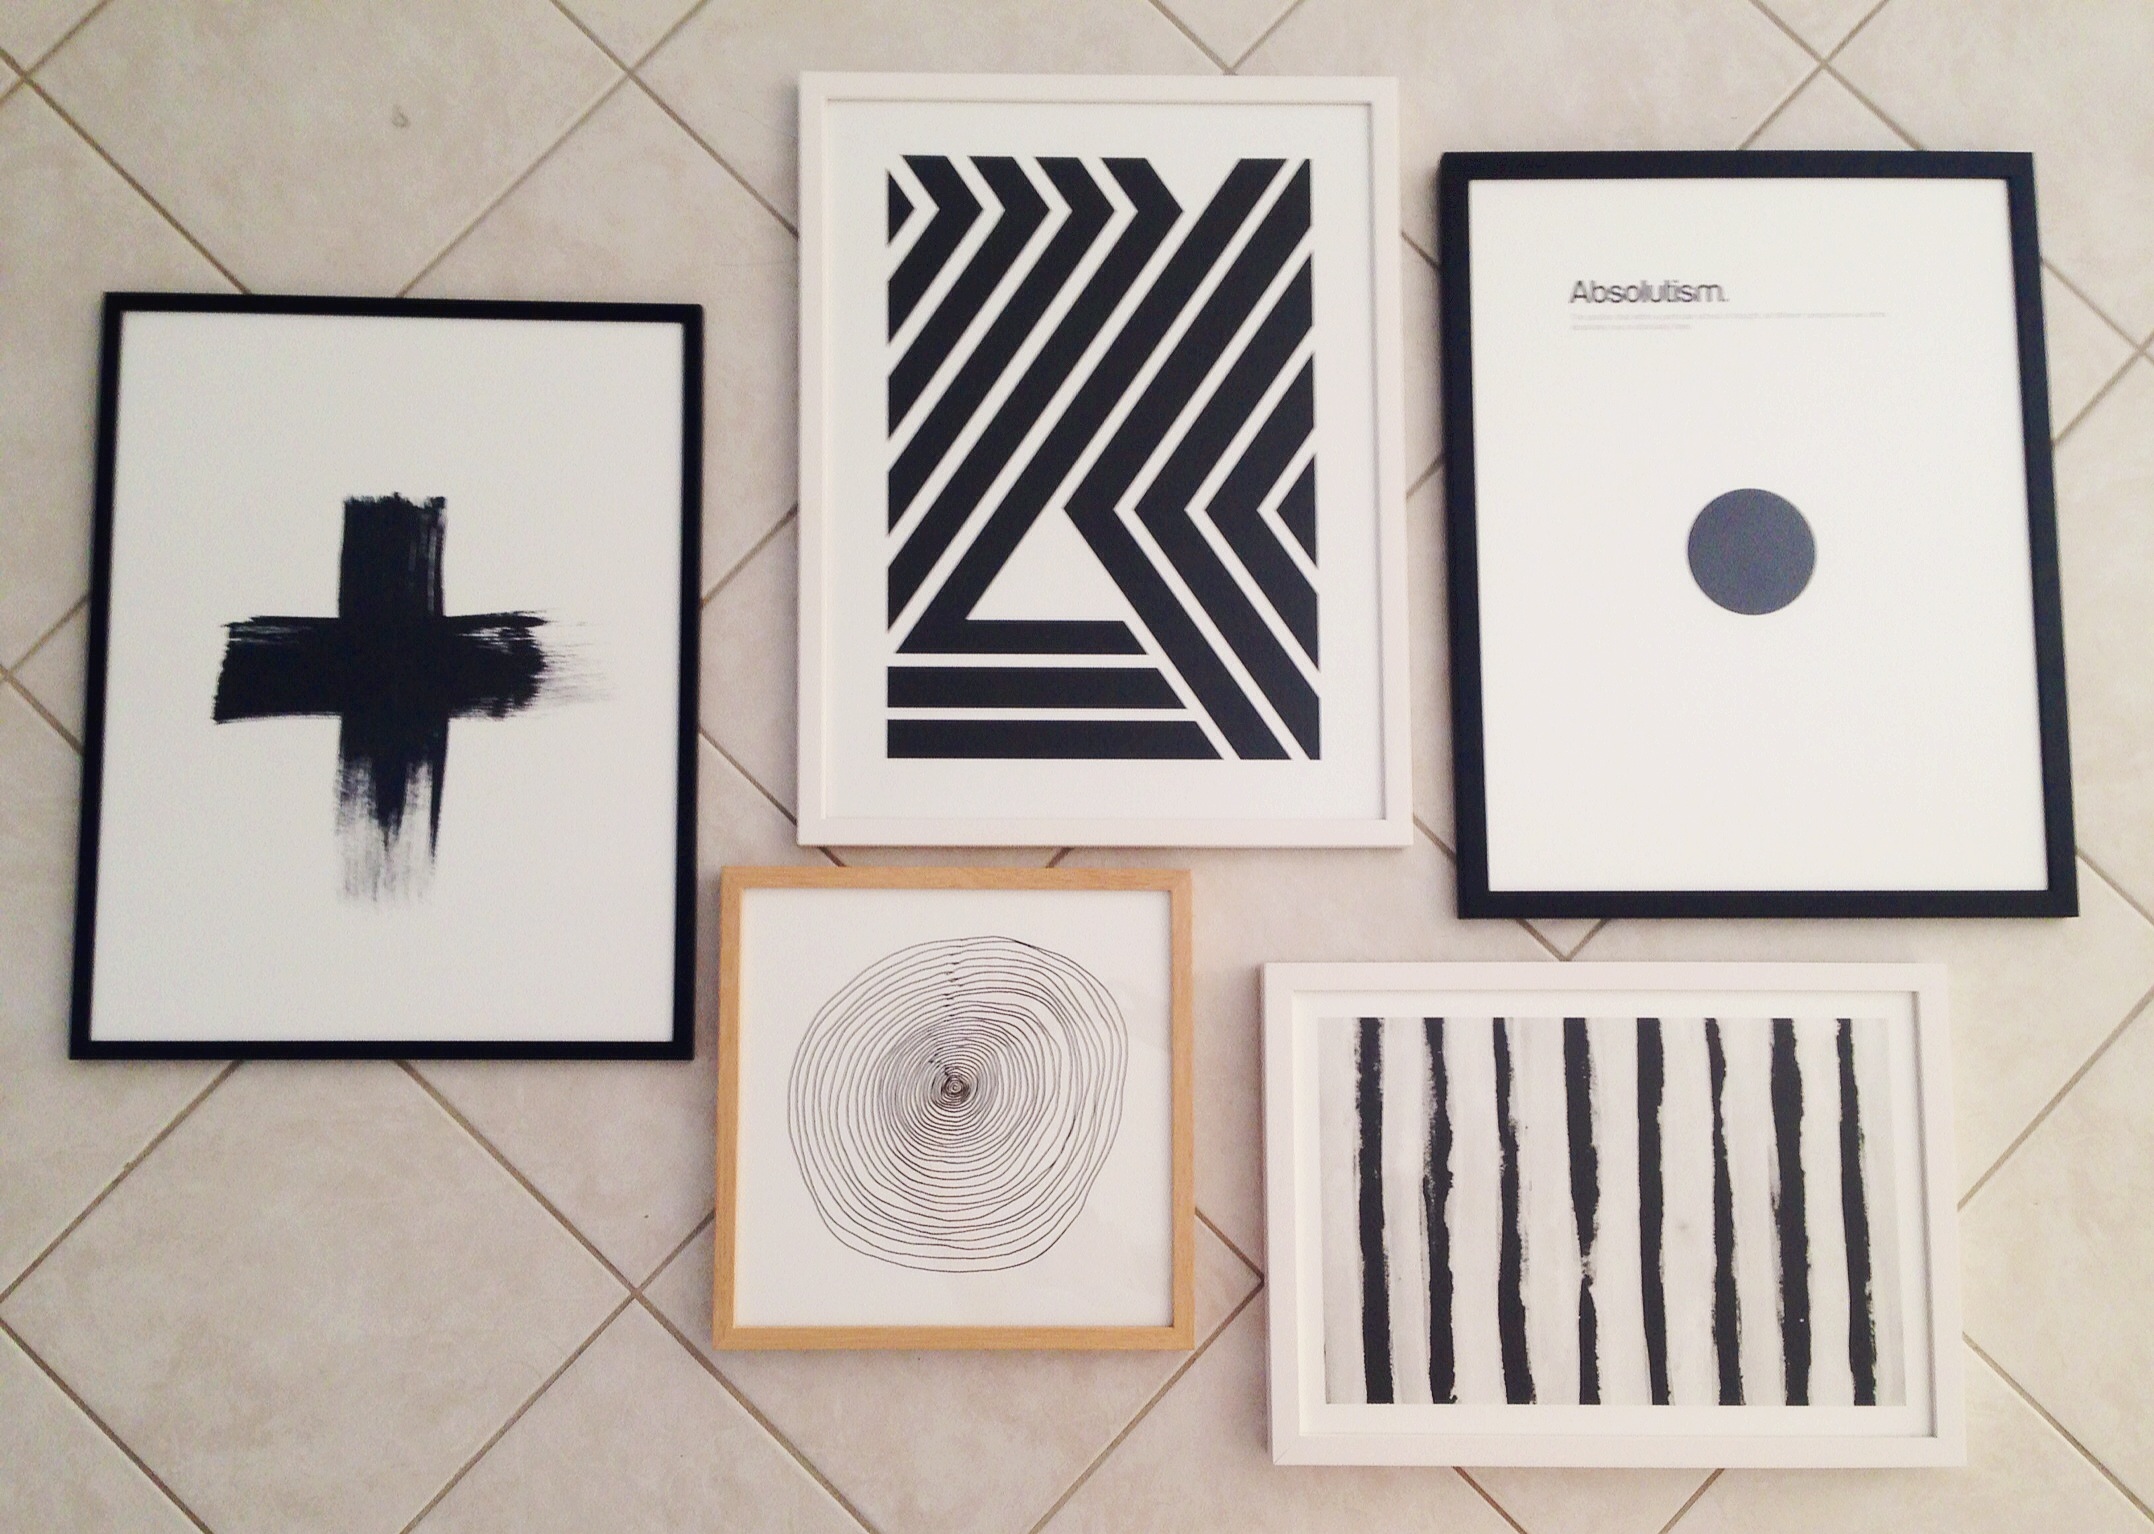
Once you have your artwork all framed lay them out on the floor how you think you would like them to work together on your wall. Make sure you pic the best frames that match each print perfectly. You don't need to have them all matching to have a hot wall.
STEP TWO
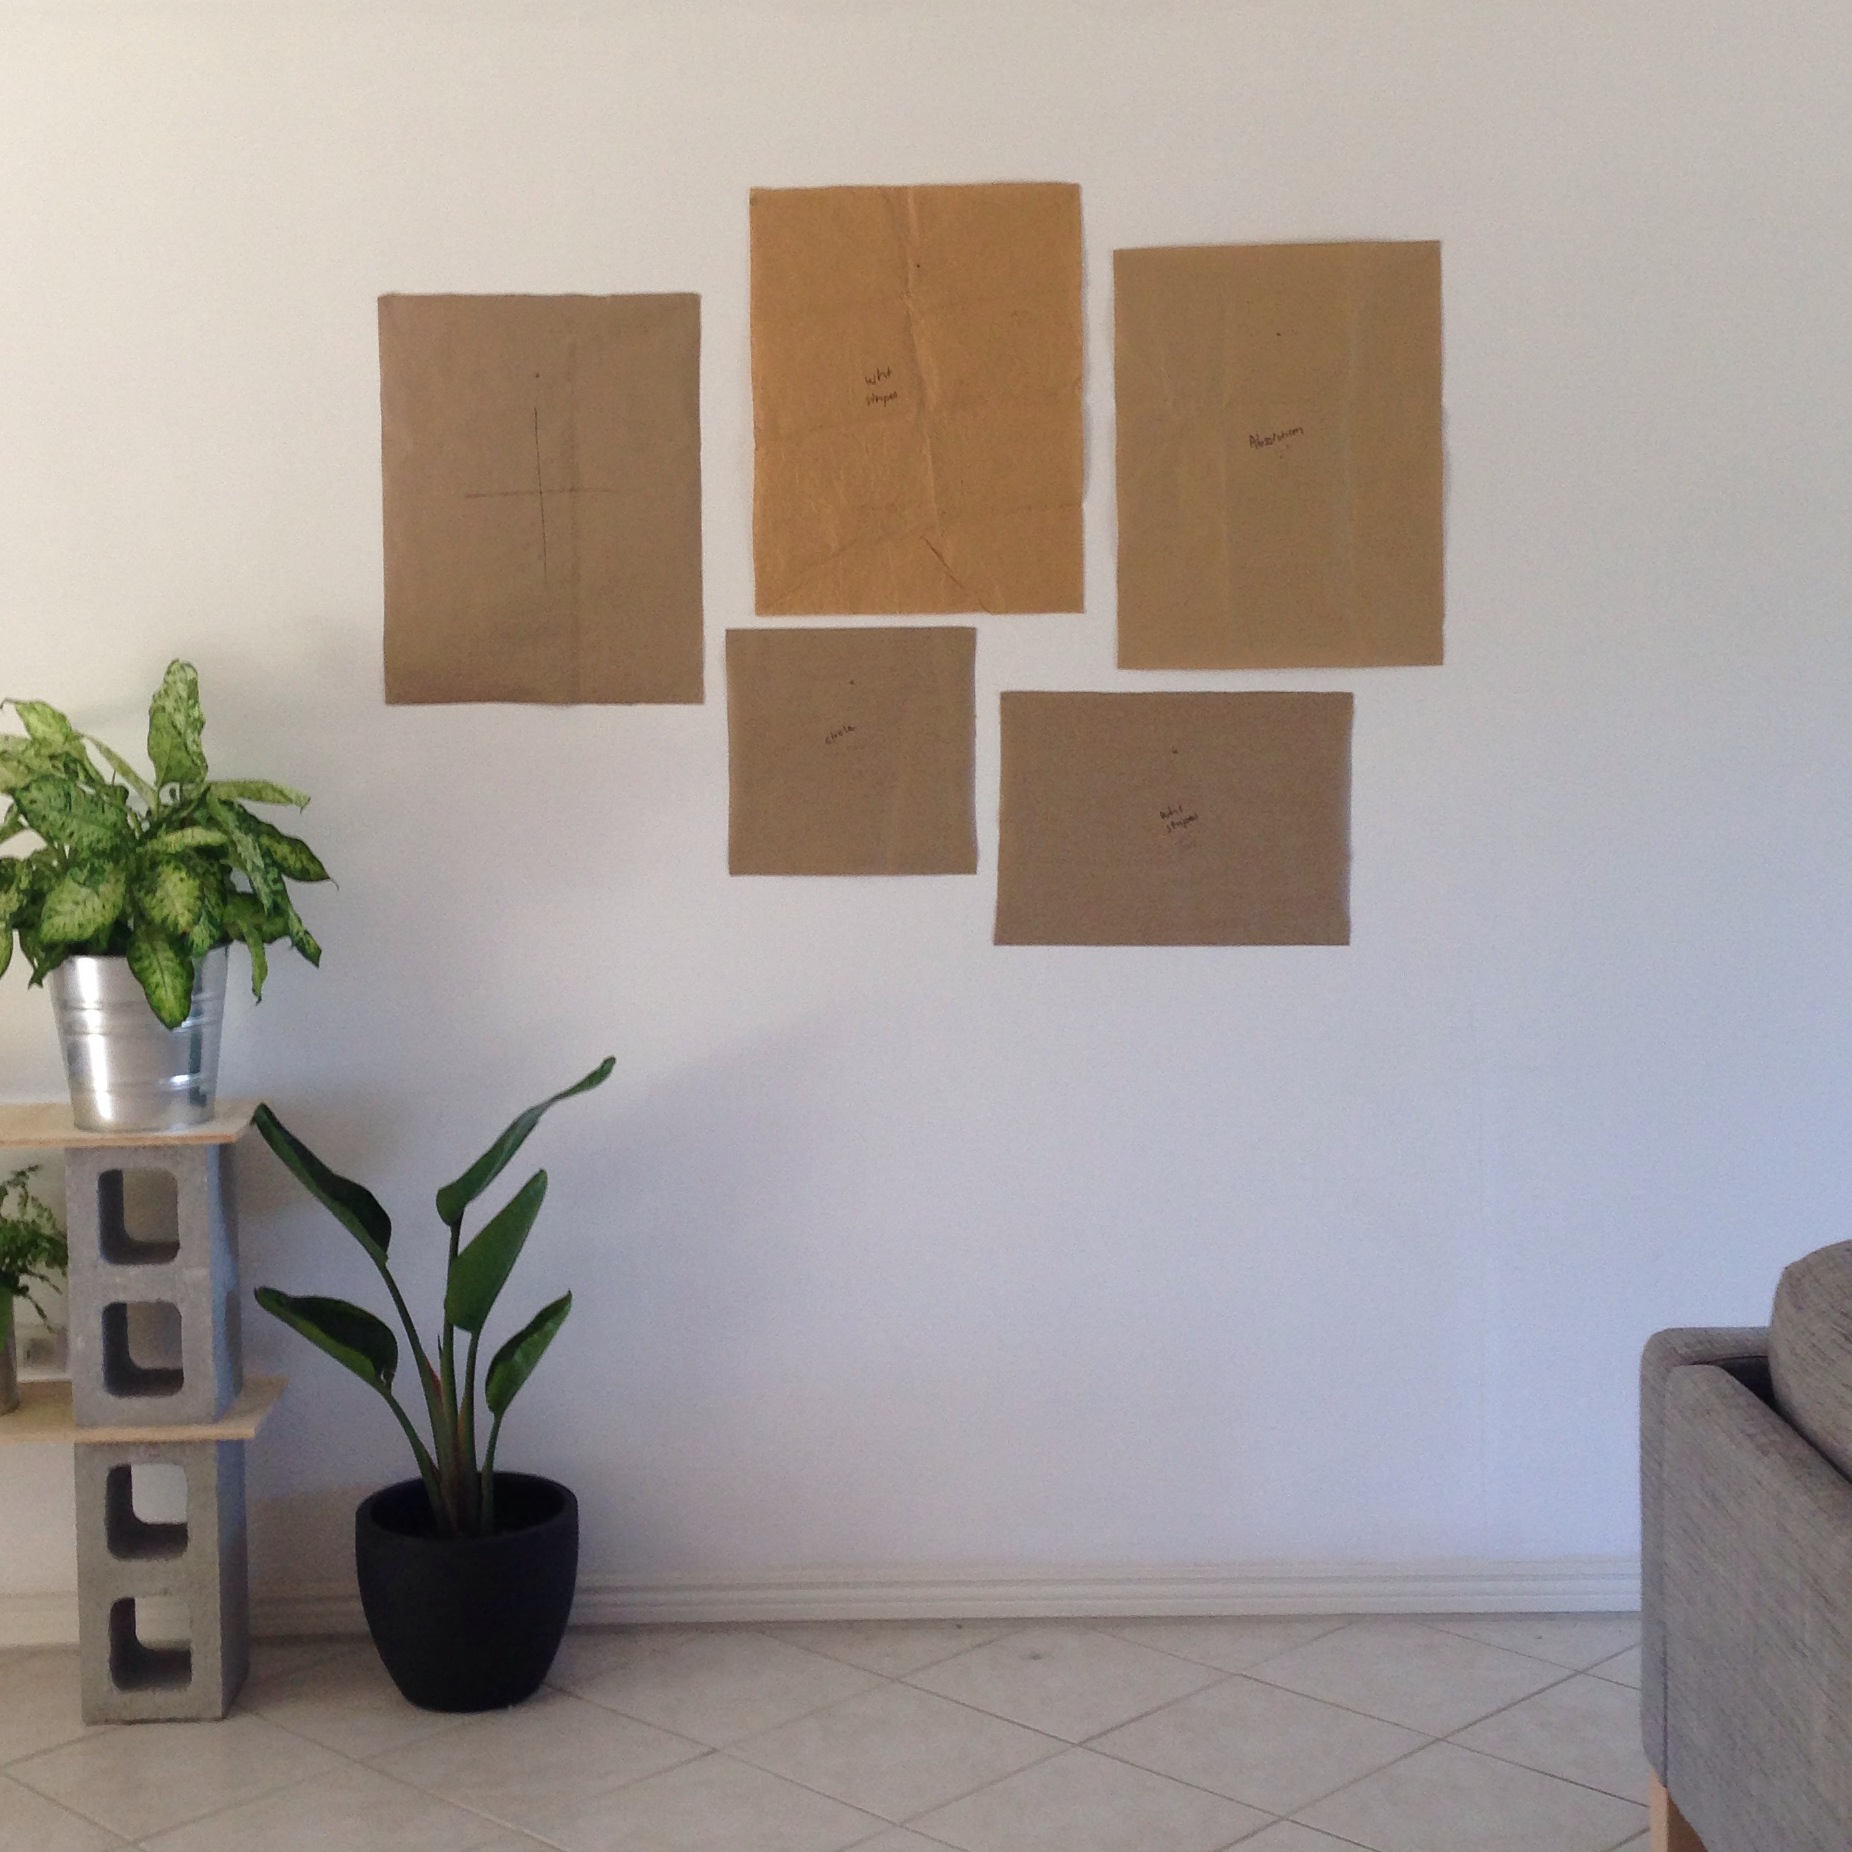
Take some scrap paper and trace around the edge of each frame, from here you want to cut out each frame size.
STEP THREE
Using adhesive such a Glu Tac, start placing your most centered frame on the wall. Once you are happy, start placing the other frame sizes around your main artwork. Keep checking that you like the spacing.
STEP FOUR
Now is the time to get your hooks on! Depending what kind of hook you are using (nail or removable) you can measure the appropriate distance using your patterns on the wall for the best results.
STEP FIVE
Hang those bad boys! Take a step back and admire that killer wall you have going on!