
DIY | Christmas Tree

It's December 1, aka officially Christmas time! Leave it to Brogan, our photographer/resident DIY specialist, to create the coolest Christmas tree we've ever seen. Her unique hanging tree made of driftwood and twine is beachy, beautiful, and best of all-- SO affordable and fun to make. Read on to see how she did it so you can step up your Christmas game this year and make your own. What you’ll need:
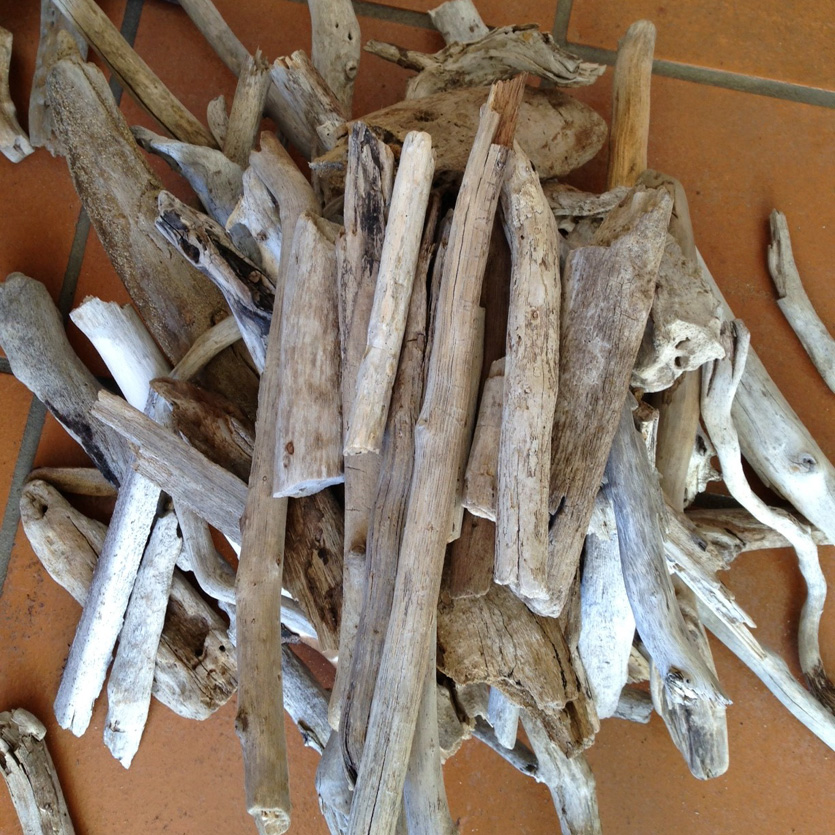
- Driftwood
- Twine (or any sturdy string)
- Scissors
- Nail with a hook to hang tree from wall
How to:
1. COLLECT YOUR DRIFTWOOD. Go to a beach with plenty of driftwood and collect a variety of shapes, sizes, and colours. This can be the tricky step as most beaches are cleaned up and stripped of all of their awesome driftwood (I found mine in Mackay).
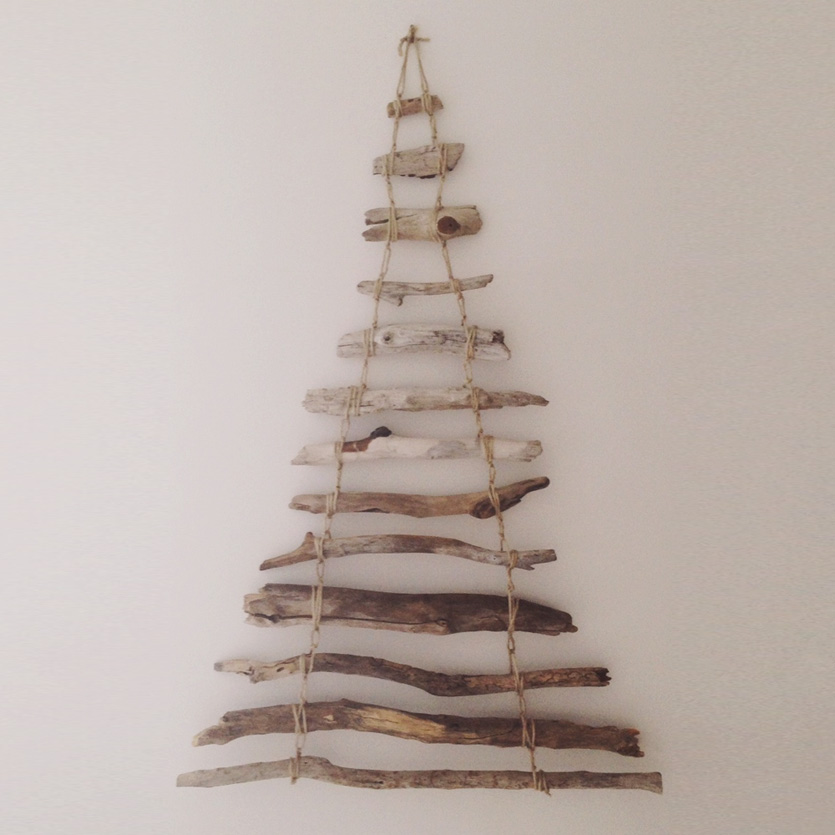
2. LAY OUT YOUR TREE. Once you have your collection of driftwood, it’s time to lay out your tree on the ground. Arrange the sticks by size so that they form the shape of a tree (longest at the bottom, shortest at the top). The number of pieces/rows will depend on how tall you want your tree to be (I used 13). There are many different ways you can create a tree – so remember there’s no set look.
3. HAMMER. Hammer your nail into the wall where you want the top of the tree to hang from. Tip: If you're using fairy lights, you'll want to choose a wall where there is access to a power outlet nearby to plug them in.
4. CUT & TIE YOUR STRING. Now that all your driftwood is laid out, cut 4 LONG pieces of twine (about 5 meters each). The lengths of these pieces will determine how many rows of driftwood you can fit on your tree, so it’s best to over-estimate to be safe. Once you cut all four pieces, line up the ends of the string and tie them together in a super tight triple-knot. Once you have your sturdy knot, place it on top of the hook part of your nail. Divide the strings so that two are hanging down from each side of the hook. This is now the point of your tree!
5. WRAPPING & KNOTTING. Once you have the point of your tree, start to attach each piece of wood, working from the shortest to the longest. Take the strings that you divided and wrap them twice around the ends of each piece of wood (the left strings on the left end, the right strings on the right end). Make sure that they are hanging straight and not lopsided, and then tie a double-knot on each side to secure. Side note: I did this by myself, but this step would've been a lot easier if I had someone to help me. I ended up kind of balancing the wood on my head while I tied... it can be done but it's a bit awkward.
6. REPEAT. When you’ve finished knotting and wrapping the first piece of wood, repeat the process for each new row. Try to make the gaps between the rows as even as possible.
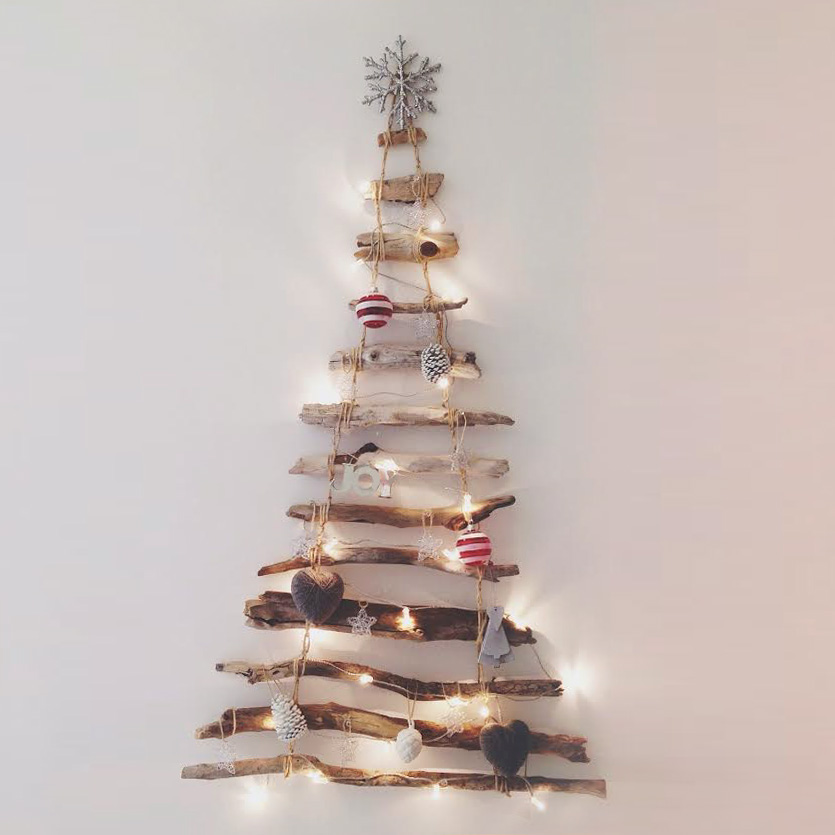
7. DECORATING. And wallah!!... it’s now time to decorate with fairy lights, stars, spray painted pine cones & all the Christmas goodies you can get your hands on!! I got my fairy lights from Ikea.
P.S. If you’re still feeling a little lost, have a squiz on Pinterest at the endless possibilities of driftwood Christmas trees: https://www.pinterest.com/explore/driftwood-christmas-tree/